Showing posts with label Terrain. Show all posts

Friday, 31 July 2015

Don't get excited but....


Greetings Gentle Readers,

During the mysterious absence of my painting mojo, I have been fiddling around with my X-Wing Miniatures, planning squad builds and making deck boxes and mulling over storage decisions. Dull stuff, but it is keeping me ticking over!

I did manage to enhance my asteroid tokens so they look a bit better on the tabletop - I used some lava rock and some cheap clear flight stands from ebay.

Simple but effective, and I am reasonably pleased with the result.

Rocks

The same rocks from a different angle

Etc.


Until next time......


Thursday, 7 May 2015

Curtey's Miniatures 28mm Dark Age Farm Unboxed

I've had my eye on the Dark Age Farm by Curtey's Miniatures for a while now, and I managed to pick one up as part of my swag from Salute. At £55 it wasn't a cheap buy, but it is an inspired piece of scenery and will look good on the tabletop. Bottom line is I'm a sucker for a nice bit of scenery.....


It includes five resin buildings:


Plus some accessories and some civilian figures:
 
 
Metal doors and two beautiful thatched beehives.
Two clay ovens and a selection of non-combatants.


Plus a sprue of Renedra's Wattle Fencing to tie it all together.


Close-up of the box art: Painted example
 
You can see some more examples of the finished item here.  I'm looking forward to putting this lot together and getting it on the table.
 
 
On a separate note the Mighty Ray Rousell of Don't Throw A One, is holding a mega-giveaway to celebrate his 500th post. Many congratulations on reaching that milestone, Ray - his is an excellent blog and well worth following. I am not registering for any of the prizes as I have plenty to build and paint thanks to Salute, but there's lots of lovely prizes so take a look!
 
 
Until next time.....


Thursday, 12 February 2015

Property Development Part 2

Continuing from Saturday's post, I have now completed the Dark Ages camp, with an additional single tent should it be required:


I also completed the ramshackle barn - I deliberately gave it a neglected and overgrown look:


Until next time......


Sunday, 8 February 2015

Property Development

Greetings!

This week's annual leave has enabled me to catch up with a lot of stuff, not all of it hobby-related. One thing I managed to advance was my portfolio of desirable properties. Firstly I worked on a generic Dark Ages camp using Renedra's excellent saxon tents. I'd painted the tents and campfire previously and have rebased them on a silver cake board (I use these quite a lot for scenery - cheap and robust. Being silvered they don't warp and you can get quite messy with them in terms of ground-gunk and paint, filler etc. plus they come in a variety of sizes). I am currently working up the groundwork so this picture is very much work in progress:


I am also working on another Renedra project - the Ramshackle Barn, which is a lovely kit. Long way to go yet, but the basics are in place, plus a trough and pump from Hovels and an old haystack courtesy of ebay:


Those of you who frequent the Paint Table Saturday community may have seen my completed Norman Keep. This is a Sarissa Precision laser-cut MDF kit. I have made a few MDF buildings and now have an established routine for painting them:
 
1) Build with PVA glue.
2) Spray with primer colour to suit the main building. This may need two or three light coats.
3) Spray with acrylic matt sealer to give a good surface for painting detail.
4) Paint details with usual paints (in my case Vallejo/GW etc. acrylics).
5) Another coat of acrylic sealant.
6) Light spray coat of anti-shine if required.
 
I like MDF buildings that have a bit of character, or are of a type that cannot be sourced elsewhere, but they are by no means a simple, or cheaper, alternative to resin, apart from the postage costs.


A few years ago I picked up an out-of-production Grand Manner medieval forge from ebay. As is the way of things, I've only just got round to doing anything with it! Resin always paints up well, thanks to the amount of detail the resin provides - a great opportunity for washes and drybrushing that would be wasted on MDF buildings. It originally had a mail hauberk hanging on the wall (which sort of limited its use for post-Norman games) so I modified that. It also had a badly moulded anvil on an integral tree trunk which I cut off. I then added some white metal accessories (worktable, anvil and water tub, again from Hovels) to fill up the space a bit. All that's left to do is a little bit of groundwork - tufts, and a small bush or two. It certainly illustrates what I said earlier about buildings needing character - this item wouldn't be as good-looking in MDF. It's a shame Grand Manner discontinued it, as it's a lovely little building and useful for anything up to the 18th century with a small amount of work.


Hopefully all these will be finalised today as it's a good day for spray-varnishing, then it's back to the figures!
 
 
Until next time.............


Monday, 29 December 2014

My Santa Clause Project & Happy New Year!

2014 was my first year blogging, and it was also my first year taking part in the Secret Santa and Santa Clause. The latter caused me a few problems as my recipient has his fingers in lots of wargaming pies! You would think that would make the gift easy to decide on - believe me it didn't! Coupled with the fact that the Blogger in question is an excellent painter, one that I knew I would struggle to match paint with, and I was in a right old dilemma....

Eventually I decided to create a small terrain piece that would serve as both an objective and a bit of battlefield decoration. I also decided to tie it in with the Blogger's beautiful ECW armies. Unusually for me I had the foresight to take a few pictures as I built it, so prepare for the wargaming equivalent of holiday photo's!

Here are the initial components:


I wanted to make a plundered wagon, perhaps part of a baggage train, with a few dead and wounded figures around it, and perhaps some strewn baggage....

The base was an offcut of ply covered in sand, and painted in burnt umber. I built the lovely 4Ground wagon and assembled some items from my bits box.

 
After a couple of dry-runs I decided on the placement of most of the items, and started painting:


At this point I neglected to take some intermediate photo's (typical), but rest assured there was a painted wagon (minus Lee Marvin - Laugh only if you are over a certain age...) with a few scattered bits of baggage and a couple of casualties. It was all looking a bit random. That's when the Current Wife asked if the bodies were plunderers or guards. I obviously looked puzzled. 'If they were guarding a consignment of wine it would explain why they all look drunk, she reasoned! I swear to god I have no idea where these occasional flashes of genius come from, but that must be why I married her!
 
 
I sourced some white metal bottles from Scotia Grendel, scratch-built a crate for the plundered booze and set about modifying the vignette. I also added another figure who looked as if he was on the point of emptying his stomach..........


So, after a bit of trial and error, and thanks to Mrs Pendragon, it turned out OK, and more importantly (at least to me) it told a little story that was readily obvious to the onlooker.
 
The recipient was the entertaining Mr Gary Amos of The Happy Valley, and thankfully (judging from his Blog), he seems to like it. Pop along to his post on the subject if you want to see much better photo's than mine!
 
 
And finally: As I said earlier, this was my first year of Blogging, and I have enjoyed it immensely. I have met some great people (albeit online, I hope to attend Salute to see if some of them are as weird in the flesh....), and it has given my painting a great big (much-needed) kick up the butt!
 
 
I would genuinely like to wish you and yours a happy, healthy and wonderful New Year. May it bring you everything you would wish for yourself. Here's to 2015!
 
 
Until next time.................


Sunday, 7 December 2014

Showcase - Part 3 of an occasional series

Once again to reiterate - My showcase series is not to say 'Look how clever I am' - I am well aware that there are much better painters and modellers than me out there! I just use this series to share items in my collection that I am particularly happy with and that others may appreciate or enjoy.

Enough - This time it's the Perry Medieval Cottage. A lovely kit to build, and one that lends itself to looking good on the tabletop with the minimum of work:


It comes with a small animal shelter/wood store, which I think would benefit from some sawn logs (i.e. cut-up twigs) to finish off - Note to self.


I tried to keep the colours fairly muted, and not overdo the groundwork. I could have added beehives (from Grand Manner) and perhaps a tree or two, but I think the finished item benefits from its simplicity. It's too easy sometimes to overpower a piece with accessories. Plus it leaves room for figures, something I often overlook!


The base is a cake board (the silver type) with mixed grade sand glued on. Ground colours were charred brown, desert yellow then skeleton bone. I used only two types of flock; coarse turf and fine static grass. I topped this off with a rubberised horsehair bush and some Army Painter summer clumps of grass. The bench is from Midlam Miniatures who make all sorts of interesting items.


Army Painter anti-shine spray finished off the piece. The Current Wife has pointed out that I photographed it on the most worn piece of hall carpet there is in the house and I should be ashamed! New carpet time in January methinks!


Until next time...............


Sunday, 19 October 2014

What I did on my holidays - Part 2 of an occasional series

Operation Deadstick - Assault on Pegasus Bridge: D-Day 1944

The original bridge assaulted by the Ox and Bucks Light Infantry on the night of the 5th June now resides in the Pegasus Memorial Museum, a mere stone's throw from where it originally sat. Given the availability of the bridge in a variety of scales, thanks to the arrival of laser-cut mdf kits, I thought I would illustrate some details of the original bridge, and point out some items of interest related to it.

The Caen Canal (as well as the River Orne) would form major barriers to the troops coming up from Sword Beach on D-Day, so it was imperative that their crossings were secured quickly and comprehensively to avoid the invasion getting bottled up.

Pegasus Bridge (or the Benouville Bridge as it was known then) was captured by glider troops, relying on the element of surprise, and attempting to land as close as possible to the bridge.

The new bridge seen from the gliders' landing area
The bridge shown is the new bridge, over a widened canal, but the obelisk (next to the bust of the mission commander John Howard in the picture above) shows the position of the closest glider. The other two obelisks, showing the final positions, are out of picture, but mere metres away. This photograph, taken not long afterwards shows the proximity of the Horsas to the bridge itself:

Pegasus Bridge from the west


 Given the size and weight of these gliders - over 7 tonnes fully laden, and some 67 feet long, plus the fact that it was night, it was superb work on the part of the pilots that they landed safely at all, let alone so close to their intended target - an extraordinary feat!

Airspeed Horsa at the Pegasus Memorial Museum
In the UK there are parts of a Horsa on view at The Museum of Army Flying, just outside Andover in Hampshire - well worth a visit.

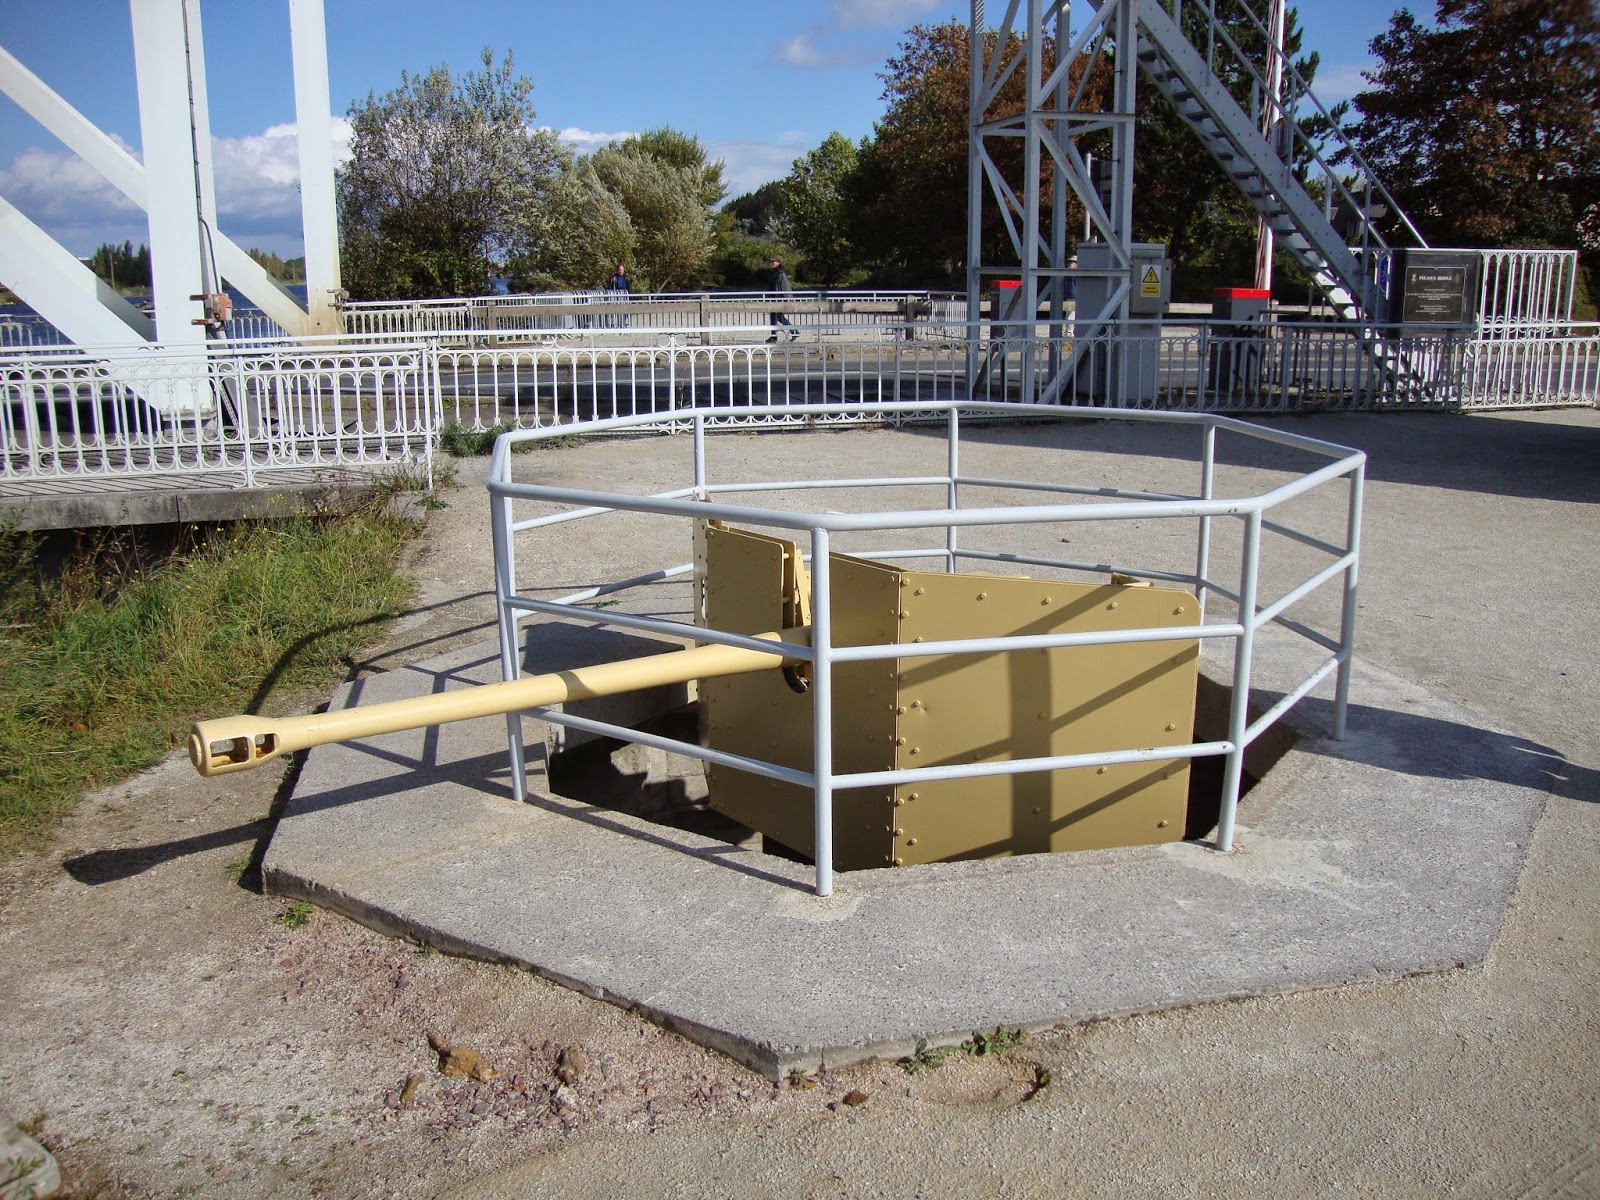
Thankfully the bridge was not well defended, although there were a handful of machine gun posts and this anti-tank gun:


The bridge itself was able to tip open, allowing canal traffic from the coast to Caen itself, hence the simple but bulky machinery at the eastern end of the structure:

The original bridge


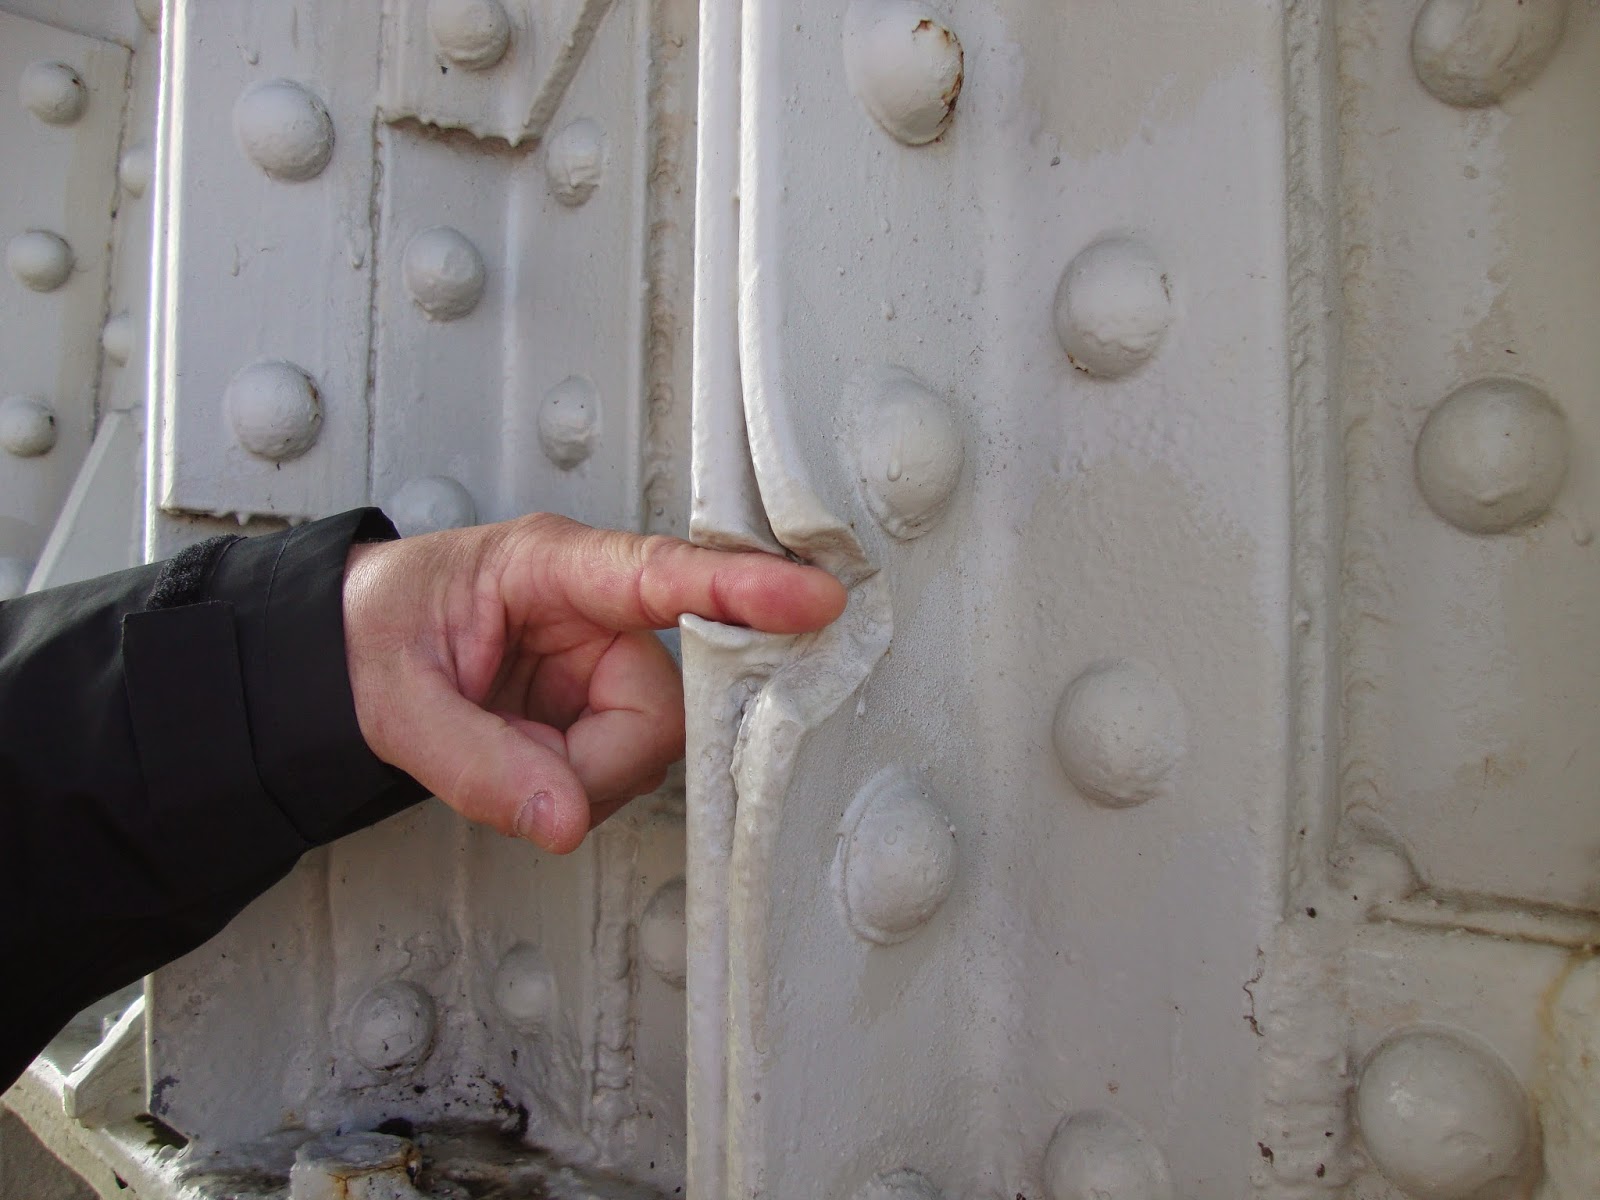
Looking around the bridge, there are numerous areas showing evidence of the Coup-de-Main attack and its dogged defence over the next few hours - bullet marks and other damage:

Shell and bullet holes.


Ricochet marks.
 
My mate Mog illustrates how soft the bridge's steel is by forcing his finger through it. Possibly.
Having watched The Longest Day more than once, it was an interesting experience to be able to walk on and touch the bridge itself, where all these historical events took place. The rest of the Memorial Museum was just as fascinating, and I may post some pictures of it later on in this occasional series.
 
Until next time............